How to use a Rust WebAssembly module in Svelte with Web Workers
WebAssembly is the future of web apps, and one of the best ways to take advantage of WASM is to use it in a web worker context with your web app.
A few weeks ago I had just such a usecase. I needed:
- A Svelte web app with a textbox and a canvas
- A WASM module, written in Rust, to render the text from the textbox onto the canvas
- A web worker to execute the WASM module on a separate thread
To my surprise, it took me several days to hack together a working app capable of the three bullets above. Both Svelte and WASM are newer technologies, so there isn’t a ton of documentation about how to use them together, especially in a web worker.
This guide walks through the above usecase to give you a recipe that you can follow for taking advantage of WASM via web workers in Svelte.
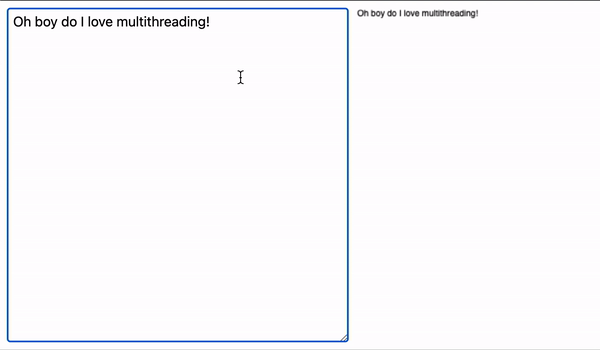
At the end, you’ll have a textbox and a canvas that gets updated through a web worker + WASM module:
Let’s create our project.
mkdir rust-wasm-svelte-worker
cd rust-wasm-svelte-worker
We’ll create the Rust renderer module first. Start by initializing a Rust library for the WASM renderer:
mkdir rust-renderer
cd rust-renderer
rustup override set nightly
cargo init --lib --edition 2021
Depending on when you read this, you may also need to add the following line to the very top of your Cargo.toml to be able to use the 2021 edition of Rust:
cargo-features = ["edition2021"]
We can now finish off our Cargo.toml by adding the dependencies and features needed to 1. Compile to WebAssembly and 2. Manipulate the canvas:
[lib]
crate-type = ["cdylib", "rlib"]

[dependencies]
wasm-bindgen = "0.2"

[dependencies.web-sys]
version = "0.3"
features = [
  "HtmlCanvasElement",
  "CanvasRenderingContext2d",
]
Next, let’s create a render function in lib.rs, which we’ll leave empty for now but will ultimately be used to draw text on the canvas:
use wasm_bindgen::prelude::*;
use web_sys::CanvasRenderingContext2d;

#[wasm_bindgen]
pub fn render(ctx: CanvasRenderingContext2d, text: String) {
    // TODO: Render some stuff onto the canvas!
    unimplemented!();
}
If you run cargo check --target=wasm32-unknown-unknown in the rust-renderer folder, you should see a success output:
Finished dev [unoptimized + debuginfo] target(s) in 7.15s
The app
Now that we have the scaffolding in place for our Rust WASM renderer, let’s turn our attention to the Svelte app. We’ll start by initializing a Svelte project using degit:
# Leave the Rust WASM renderer project:
cd ..
# Initialize Svelte app:
npx degit sveltejs/template svelte-app
If you cd svelte-app and run ls, you should now see the skeleton of your Svelte project:
README.md        public           scripts                                               │ 28
package.json     rollup.config.js src
Let’s make sure our app is working:
# This will take a minute:
yarn
yarn dev
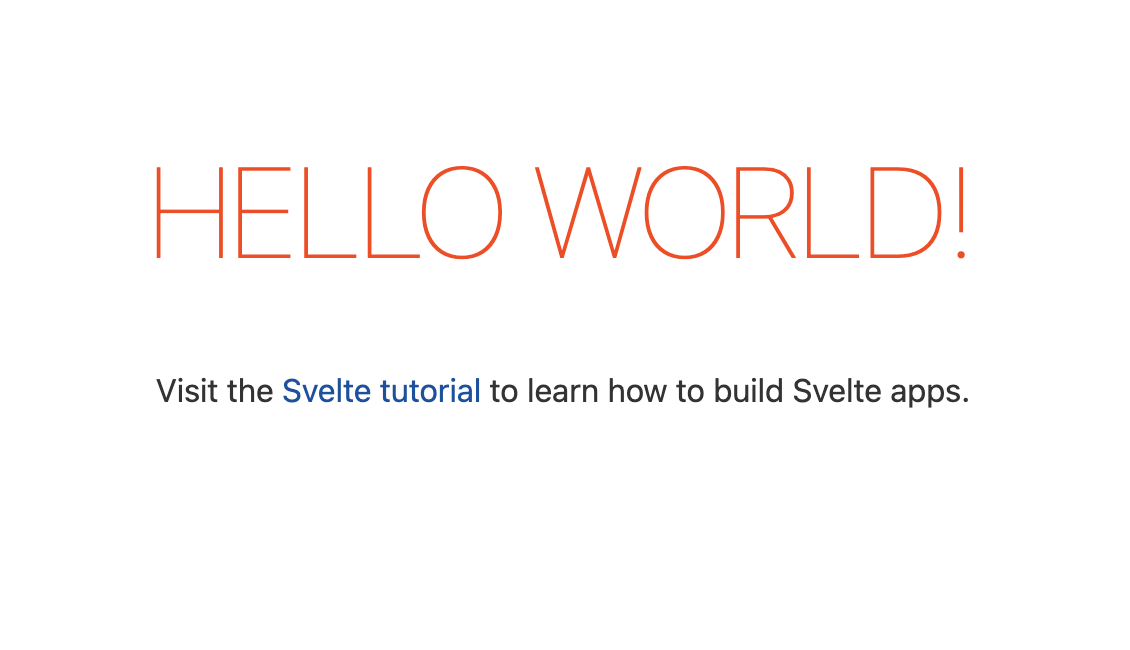
If you navigate to localhost:5000 in your browser, you should see a “Hello World!” greeting:
Now that our Svelte app is up and running, let’s create our web worker and get the Rust WASM renderer loaded.
We’re going to keep it super simple for now and add more functionality to the worker later on.
Start by creating a src/worker.js file with the following contents:
// src/worker.js

import wasm from '../../rust-renderer/Cargo.toml';

async function initialize() {
  const module = await wasm();
  const { render } = module;
  console.log(render);

  self.onmessage = event => {
    // TODO: Handle messages from the web app
  };

  // Let the web app know that we loaded
  self.postMessage("loaded");
}

initialize();
Some of this should look mysterious to you, so let’s walk through it line by line:
- At the beginning of the file, we import… um, a
Cargo.tomlfile? Looks weird, right? For now, all you need to know is that this line will magically import our Rust WASM renderer. You’ll see how shortly. - We establish a function called
initialize, which we then invoke at the bottom of the file. Inside of this function, we:- invoke the
wasm“file” and get back a module - Extract the
renderfunction that we created inlib.rs - Log the
renderfunction - Create a method on
WorkerGlobalScope.self, calledonmessage, that does nothing (for now).onmessageis how the web worker receives events from the web app. This is what we’ll use to trigger a render on the canvas - Execute a method on
WorkerGlobalScope.selfcalledpostMessage, with the single parameter"loaded". This is the opposite of theonmessagemethod. Which is to say thatpostMessageis how our worker can send events back to the web app. In this case, we’re letting the web app know that the worker has successfully loaded
- invoke the
Alright, so we have our web worker with some admittedly mysterious things in it. But how do we actually load that web worker into the Svelte app? And how does the web worker load the WASM module?
To answer that, we’ll need to visit out rollup config and make some changes.
Currently, your rollup.config.js file should look something like this:
// rollup.config.js

import svelte from 'rollup-plugin-svelte';
import commonjs from '@rollup/plugin-commonjs';
import resolve from '@rollup/plugin-node-resolve';
import livereload from 'rollup-plugin-livereload';
import { terser } from 'rollup-plugin-terser';
import css from 'rollup-plugin-css-only';

const production = !process.env.ROLLUP_WATCH;

function serve() {
    // <snipped for brevity>
}

export default {
    input: 'src/main.js',
    // <snipped for brevity>
};
We’re going make some changes to this file, but first let’s install a new dependency that we’ll need to load the Rust module.
yarn add -D @wasm-tool/rollup-plugin-rust
And add it to the top of rollup.config.js:
import rust from "@wasm-tool/rollup-plugin-rust";
This library is a tool for importing Rust modules in JS, and it’s how we’re enabling the magical import wasm from '../../rust-renderer/Cargo.toml'; line in our web worker. The library will replace this line with the import of the actual WASM module for us.
Going back to our rollup.config.js, you’ll notice that the default export is an object with input: 'src/main.js'. This object represents the Svelte app being built, and src/main.js is the entrypoint to that app.
What we need for our worker is another object representing the worker to be built, with an entrypoint of src/worker.js. We can accomplish this by converting the default export to an array, and adding a second object to that array.
export default [
  {
    input: 'src/worker.js',
    output: {
      sourcemap: true,
      format: 'iife',
      name: 'worker',
      file: 'public/build/worker.js'
    },
    plugins: [
      rust({
        verbose: true,
        serverPath: "/build/"
      }),
    ],
  },
  {
    input: 'src/main.js',
    // ...all the same stuff as before
  }
]
Now our rollup config will output a worker.js file that is able to load our Rust WASM module thanks to the rust plugin.
At this point, let’s try and load our web worker in the Svelte app. Replace the contents of src/App.svelte with:
<script>
    let worker;
    import { onMount } from 'svelte';

    onMount(async () => {
        worker = new Worker("build/worker.js");
    });
</script>

<main>
</main>
This won’t render anything, but ought to at least load the web worker.
Run yarn dev (which may take a minute since it has to compile the Rust library), and navigate to localhost:5000. You won’t see anything on the screen, but if you open up your console, you should see the output of our console.log(render) from worker.js:

This means that our renderer is loaded! You can even see some of the wasm-bindgen glue used for the render function inside of the log statement.
At this point, we just need to implement the “business” logic of the app.
Recall that our end goal for this application is:
- A textbox that the user can edit
- A canvas that displays the text in the textbox
Let’s get started by adding that textbox and canvas, along with some default text:
<script>
    let worker;
+   let text = `Oh boy do I love multithreading!`;
    import { onMount } from 'svelte';

    onMount(async () => {
        worker = new Worker("build/worker.js");
    });
</script>

<main>
+   <div style="display: flex;">
+       <textarea style="width: 400px;" bind:value={text}></textarea>
+       <canvas id="my-canvas" width="400" height="400" />
+   </div>
</main>
If you visit the app in the browser at this point, you’ll only see a textbox:
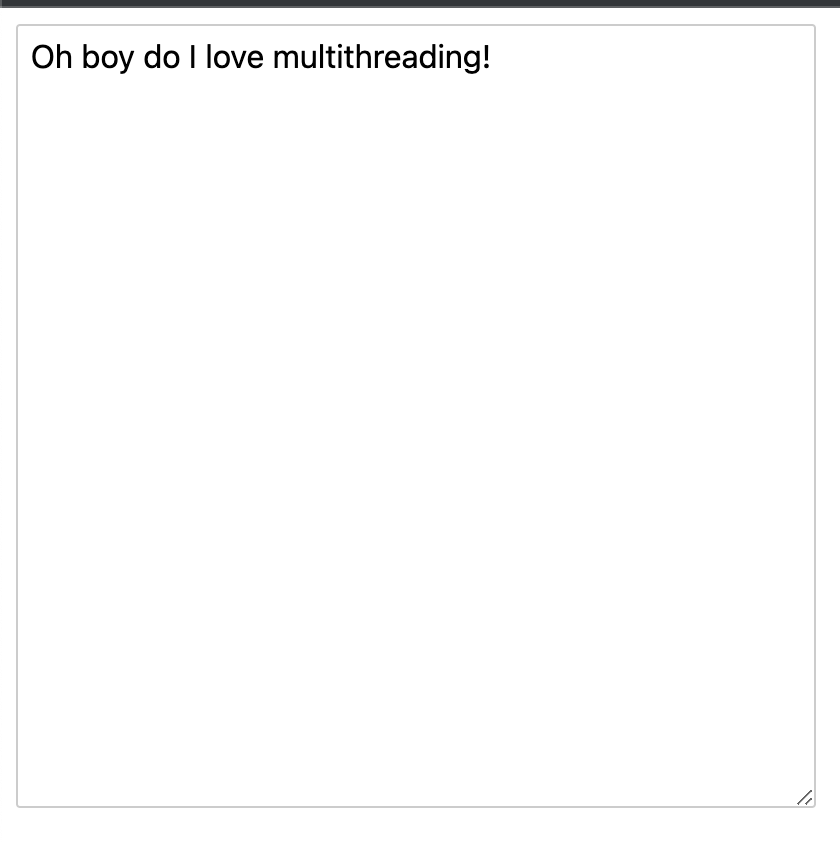
…because we’re not doing anything with the canvas yet. Right now it’s blank.
In order for our web worker to manipulate the canvas, we have to transfer control of the canvas to an Offscreen that the web worker can control. This is necessary because web workers cannot directly manipulate the DOM, so OffscreenCanvas provides a canvas that can be rendered “off screen” for the worker to use. The content of this canvas is then transferred back to the “on screen” canvas.
Let’s edit our web worker to enable it to receive on offscreen canvas, then cache it:
import wasm from '../../rust-renderer/Cargo.toml';

+ let offscreen = null;

async function initialize() {
    const module = await wasm();
    const { render } = module;
-   console.log(render)

    self.onmessage = event => {
+     const { message } = event.data;
+     switch (message) {
+       case 'transferCanvas': {
+         const { canvas } = event.data;
+         if (canvas && !offscreen) {
+           offscreen = canvas;
+         }
+         break;
+       }
+     }
    };

  // Let the web app know that we loaded
  self.postMessage("loaded");
}

initialize();
Our worker now listens for a "transferCanvas" event from the web app, then caches the offscreen canvas that the web app sends in that event. We’re not actually using the offscreen canvas yet, but that will come soon.
In App.svelte, let’s transfer the canvas to the worker once it’s loaded:
<script>
    let worker;
    let text = `Oh boy do I love multithreading!`;
    import { onMount } from 'svelte';

    onMount(async () => {
        worker = new Worker("build/worker.js");
+       await loaded(worker);
+       transferCanvas();
    });

+   export const loaded = worker =>
+       new Promise(resolve => worker.addEventListener("message", resolve, { once: true }));

+   export const transferCanvas = () => {
+       let htmlCanvas = document.getElementById("my-canvas");
+       let offscreen = htmlCanvas.transferControlToOffscreen();
+       worker.postMessage({ message: 'transferCanvas', canvas: offscreen }, [offscreen]);
+   }
</script>

<main>
    <div style="display: flex;">
        <textarea style="width: 400px;" bind:value={text}></textarea>
        <canvas id="my-canvas" width="400" height="400" />
    </div>
</main>
- The
loadedfunction allows us toawaitthe"loaded"message from our web worker - The
transferCanvas()message creates anoffscreenvar that takes control of our canvas, then transfers that variable to the worker
At this point, we should be able to add our actual rendering logic by doing the following:
- When the
textvariable changes as a result of user input, send a"render"message to the web worker - When a
"render"message is received in the web worker, invokerenderin our Rust WASM module with the most recenttext - In the Rust WASM rendrerer, draw the text onto the canvas
Let’s start by updating App.svelte to send a "render" message when text changes:
<script>
    let worker;
+   let canvasTransferred = false;
    let text = `Oh boy do I love multithreading!`;
    import { onMount } from 'svelte';

    onMount(async () => {
        worker = new Worker("build/worker.js");
        await loaded(worker);
+       canvasTransferred = true;
        transferCanvas();
    });

+   $: if (canvasTransferred) {
+       render(text)
+   }

    export const loaded = worker =>
        new Promise(resolve => worker.addEventListener("message", resolve, { once: true }));

    export const transferCanvas = () => {
        let htmlCanvas = document.getElementById("my-canvas");
        let offscreen = htmlCanvas.transferControlToOffscreen();
        worker.postMessage({ message: 'transferCanvas', canvas: offscreen }, [offscreen]);
    }

+   export const render = (text) => {
+       worker.postMessage({ message: 'render', text }, []);
+   }
</script>

<main>
    <div style="display: flex;">
        <textarea style="width: 400px;" bind:value={text}></textarea>
        <canvas id="my-canvas" width="400" height="400" />
    </div>
</main>
- We add a
canvasTransferredvariable locally so that we can avoid attempting to render until the offscreen canvas has been transferred to the worker - Our reactive
$block callsrenderwhenever the value oftextchanges - The
renderfunction posts a"render"message to the web worker and includes the text to render
Next, let’s handle the "render" message in the worker:
import wasm from '../../rust-renderer/Cargo.toml';

let offscreen = null;

async function initialize() {
    const module = await wasm();
    const { render } = module;

    self.onmessage = event => {
      const { message } = event.data;
      switch (message) {
        case 'transferCanvas': {
          const { canvas } = event.data;
          if (canvas && !offscreen) {
            offscreen = canvas;
          }
          break;
        }
+       case 'render': {
+         const { text } = event.data;
+         let ctx = offscreen.getContext("2d") ;
+         render(ctx, text);
+         break;
+       }
      }
    };

  // Let the web app know that we loaded
  self.postMessage("loaded");
}

initialize();
Our "render" message handler uses the provided text and the previously cached offscreen canvas to invoke the WASM render function.
Finally, let’s go back to our Rust library and make the render function apply the text to the canvas:
use wasm_bindgen::prelude::*;
use web_sys::CanvasRenderingContext2d;

#[wasm_bindgen]
pub fn render(ctx: CanvasRenderingContext2d, text: String, color: String) {
+   let width = ctx.canvas().unwrap().width();
+   let height = ctx.canvas().unwrap().width();

+   ctx.clear_rect(0.0, 0.0, width as f64, height as f64);

+   ctx.fill_text(&text, 10.0, 10.0).unwrap();
}
- We use
clear_rect()to clear the canvas in case there’s any text on it from a prior render - We invoke
fill_text()using thetextpassed in from the web worker
Finally, let’s run yarn dev and visit our browser. We should be able to edit the text box and see the canvas update instantly:
Even though this example isn’t all that complex, hopefully you can see the benefits of being able to:
- Write potentially complex logic in a language that isn’t JavaScript
- Execute that logic outside of the main thread in your web app